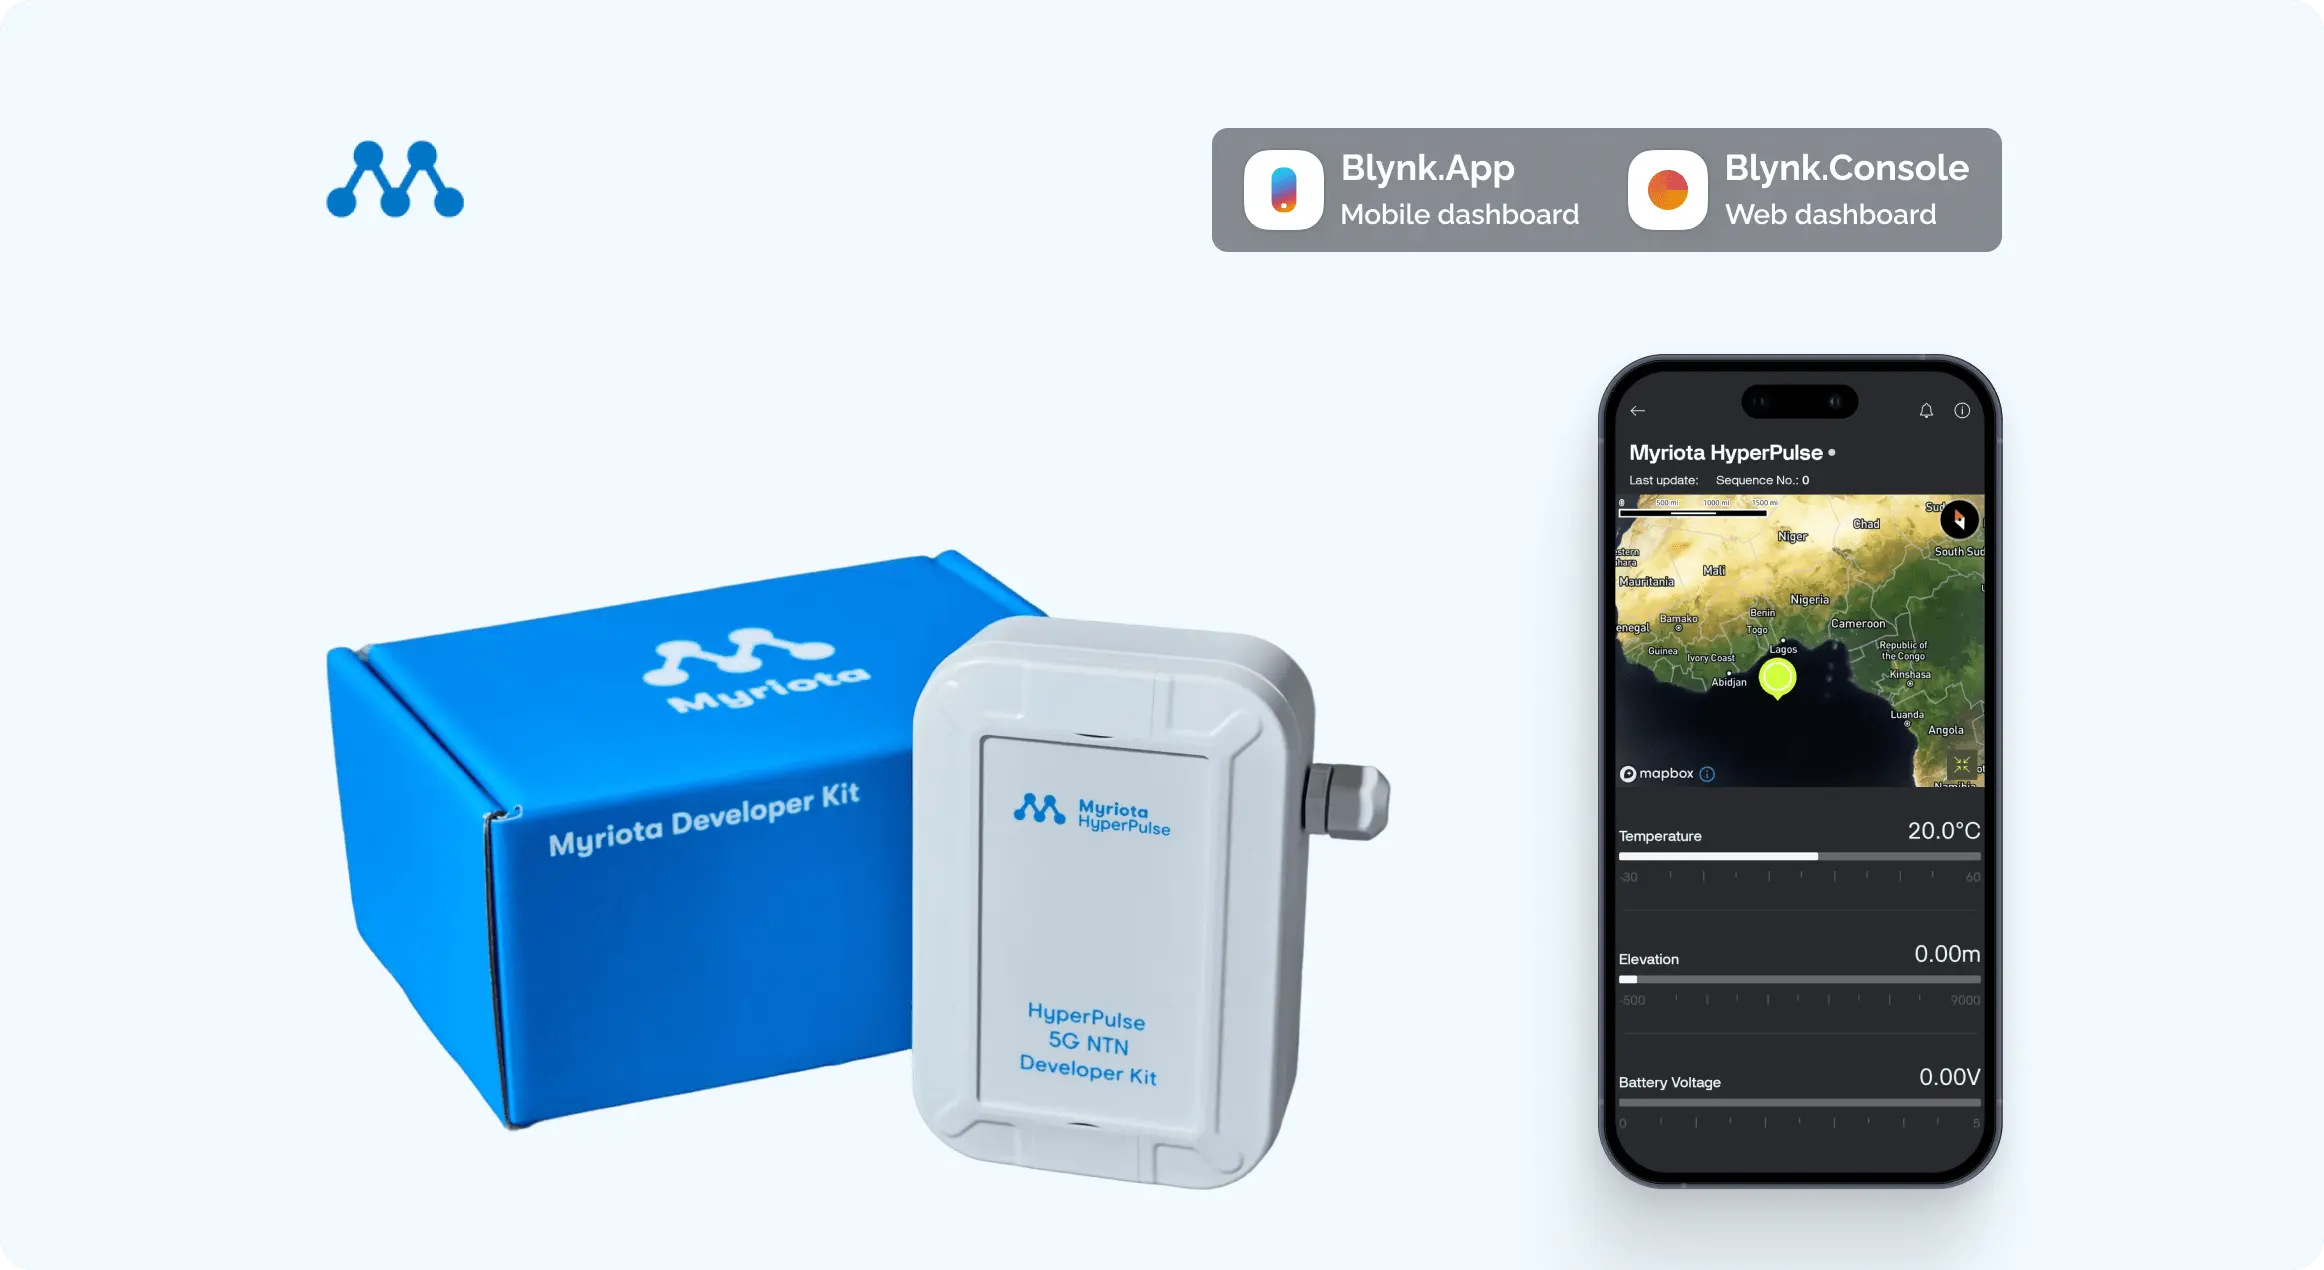
Blueprint is a pre-configured template on the Blynk IoT platform, that will help you create a fully functional project in a few minutes. It already includes mobile and web dashboard UI, working firmware, and a tutorial to help you connect your device to the Blynk IoT platform and control it from the app!
On this page you can review the blueprint to have an idea of the ready project you are going to get. Sign up for a free account on the Blynk IoT platform to try it out.
Introduction
This guide walks through connecting a Myriota HyperPulse satellite-connected devkit to the Blynk IoT platform. The HyperPulse transmits sensor data via the Myriota satellite network; Blynk receives and visualises that data through its Data Converter pipeline.
By the end of this guide, your HyperPulse readings will appear live on your Blynk dashboard and mobile app.
Prerequisites
A Myriota HyperPulse device, registered in Myriota Device Manager
A Blynk account (Free, Plus, or Pro)
Access to Myriota Device Manager
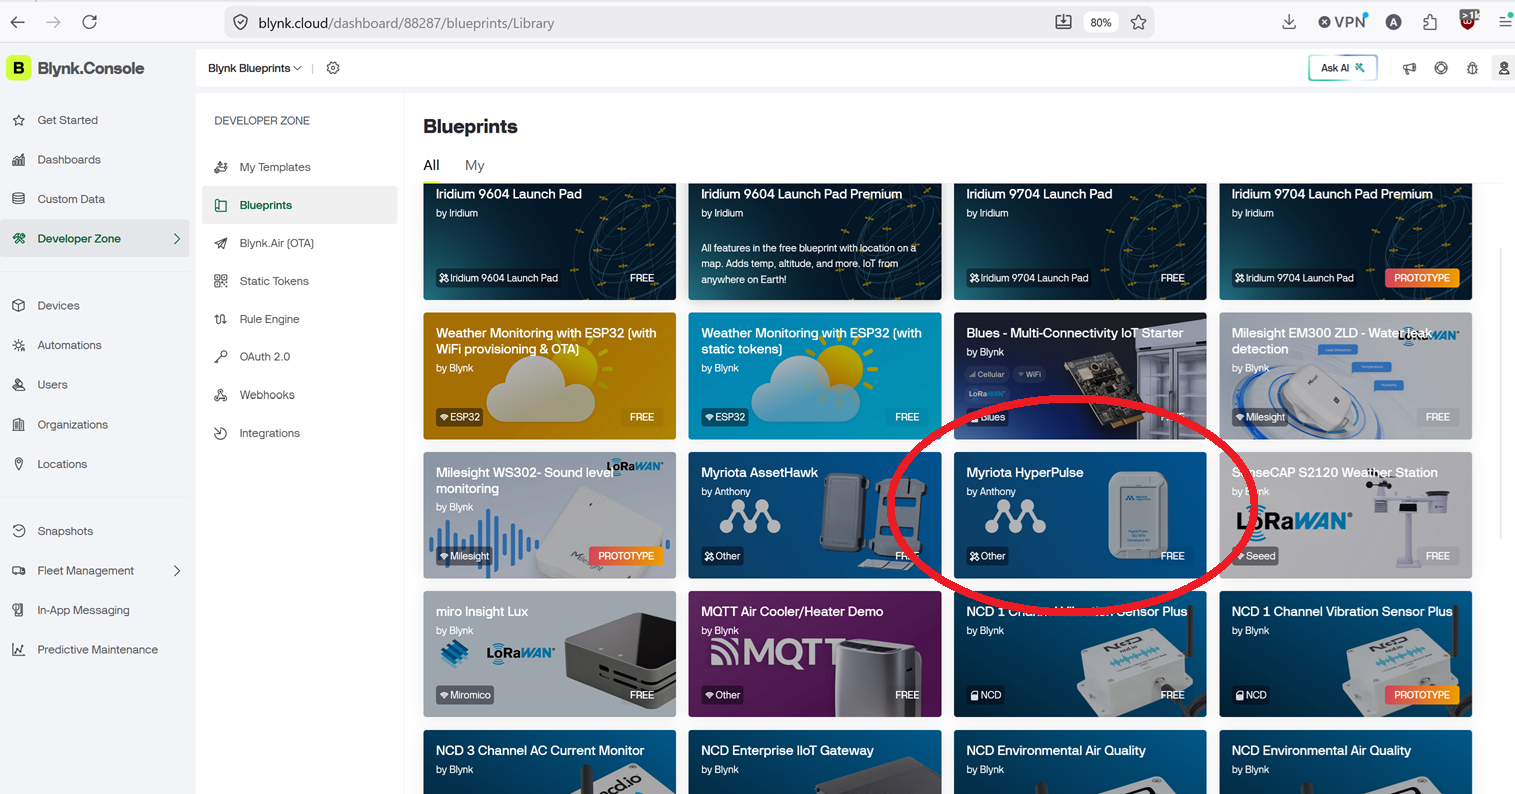
Step 1 — Install the Blynk HyperPulse Blueprint
Blueprints are pre-built templates that configure your Blynk workspace with the correct datastreams, dashboard widgets, and Data Converter script for a specific device type. Install the HyperPulse Blueprint.
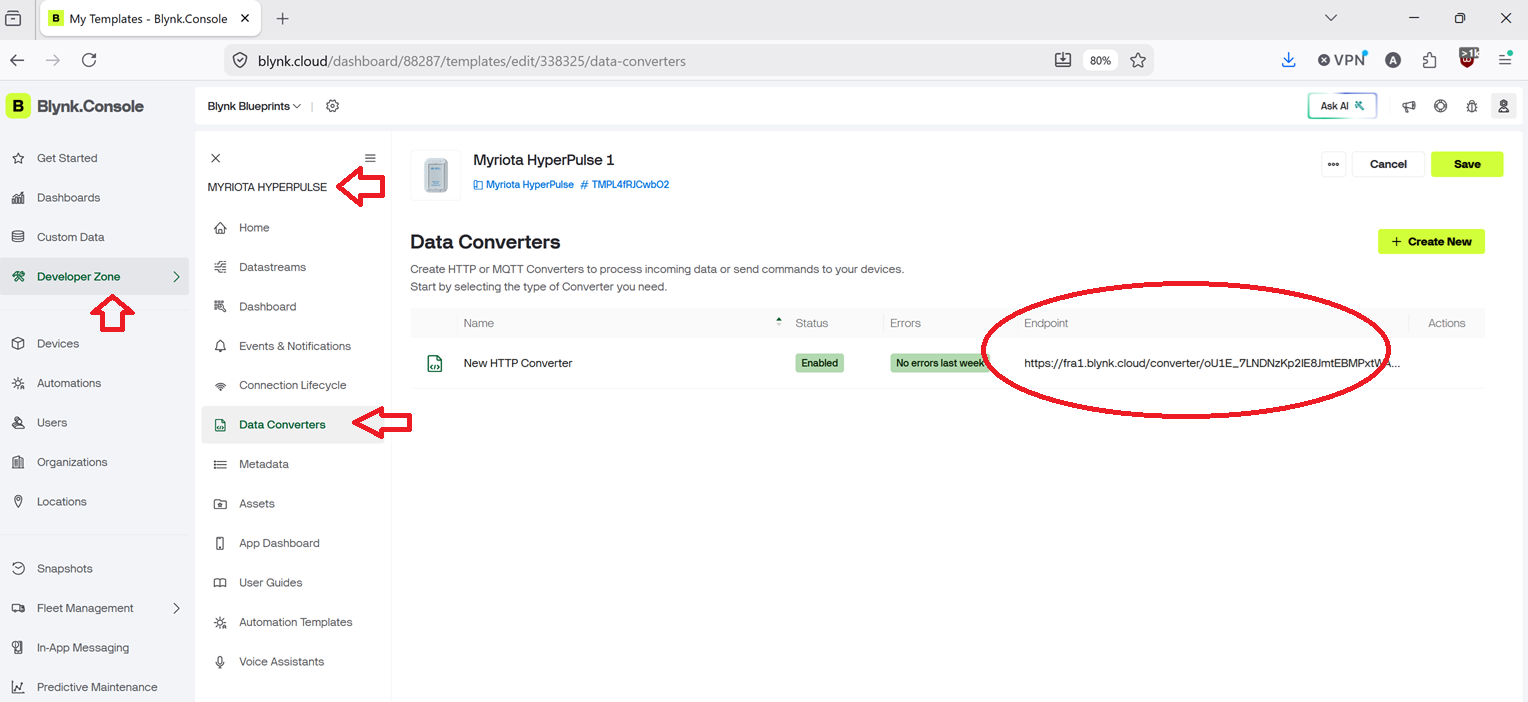
Step 2 — Find the Data Converter Endpoint URL in Your Blynk Template
After installing the Blueprint there will be a new Template in your Blynk Developer Zone. Within that Template there is a Data Convertor that exposes an HTTPS endpoint that Myriota Device Manager will POST payloads to.
In Blynk Console, go to Templates and open the HyperPulse template.
Select the Data Converter tab.
Copy the Endpoint URL — it will look similar to:
https://fra1.blynk.cloud/converter/<your_token>
Keep this URL to hand; you will need it in Step 4.
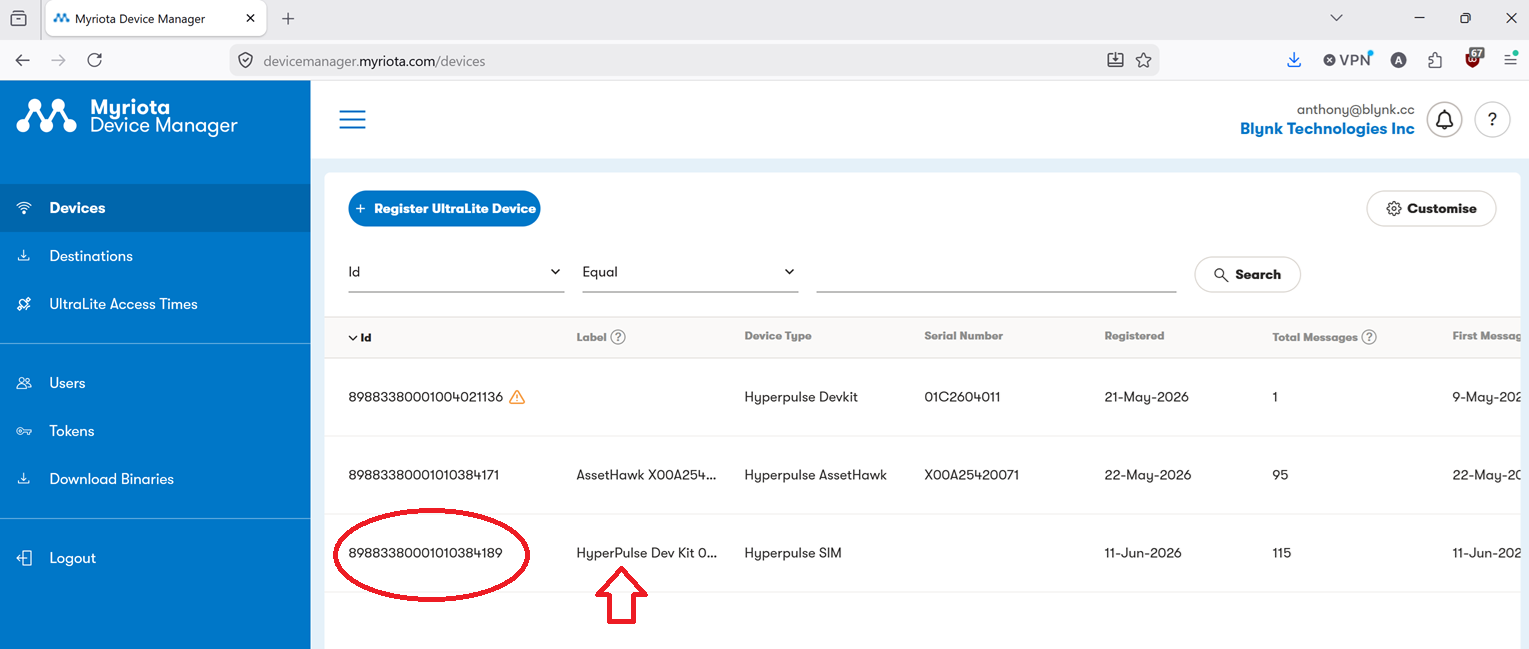
Step 3 — Find Your Device in Myriota Device Manager
Navigate to Devices and locate your HyperPulse by its Module ID (printed on the device label).
If the device is not listed, select Add Device, enter the Module ID and any required registration details, then confirm.
Note the Device ID — you will need it in Step 6.
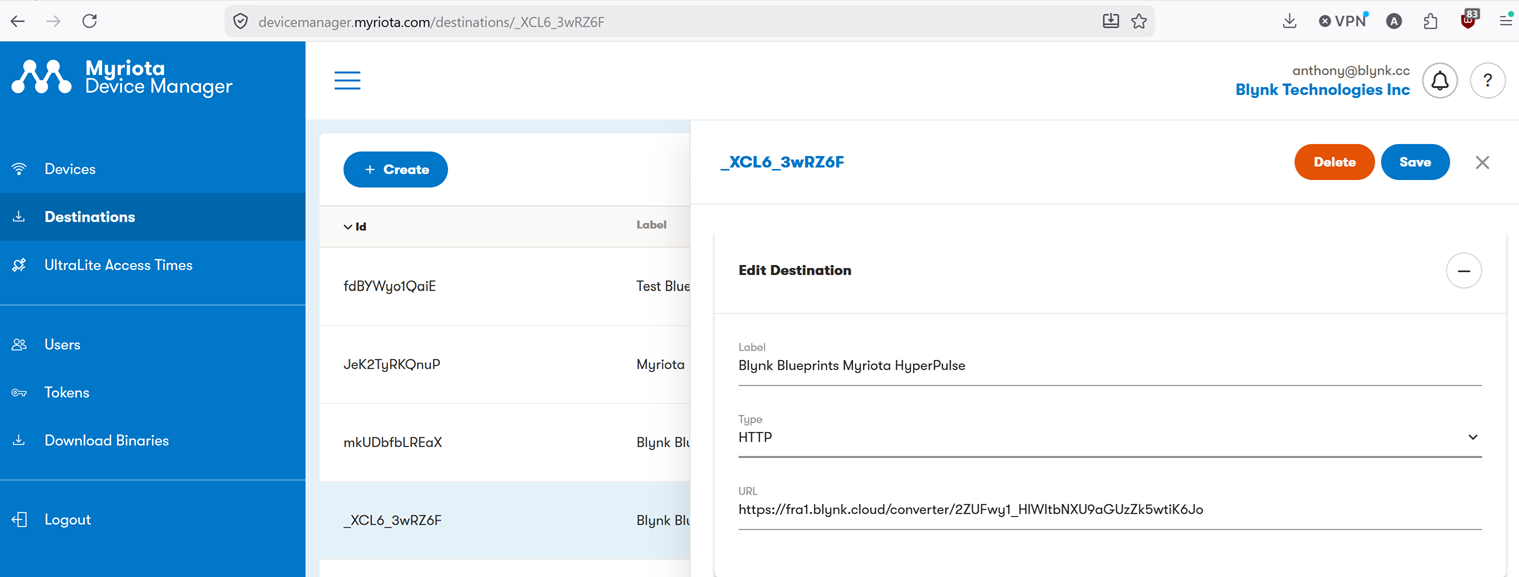
Step 4 — Create a Destination for the Data Converter in Myriota Device Manager
A Destination tells Myriota Device Manager where to forward decoded uplink messages.
In Myriota Device Manager, create a new Destination
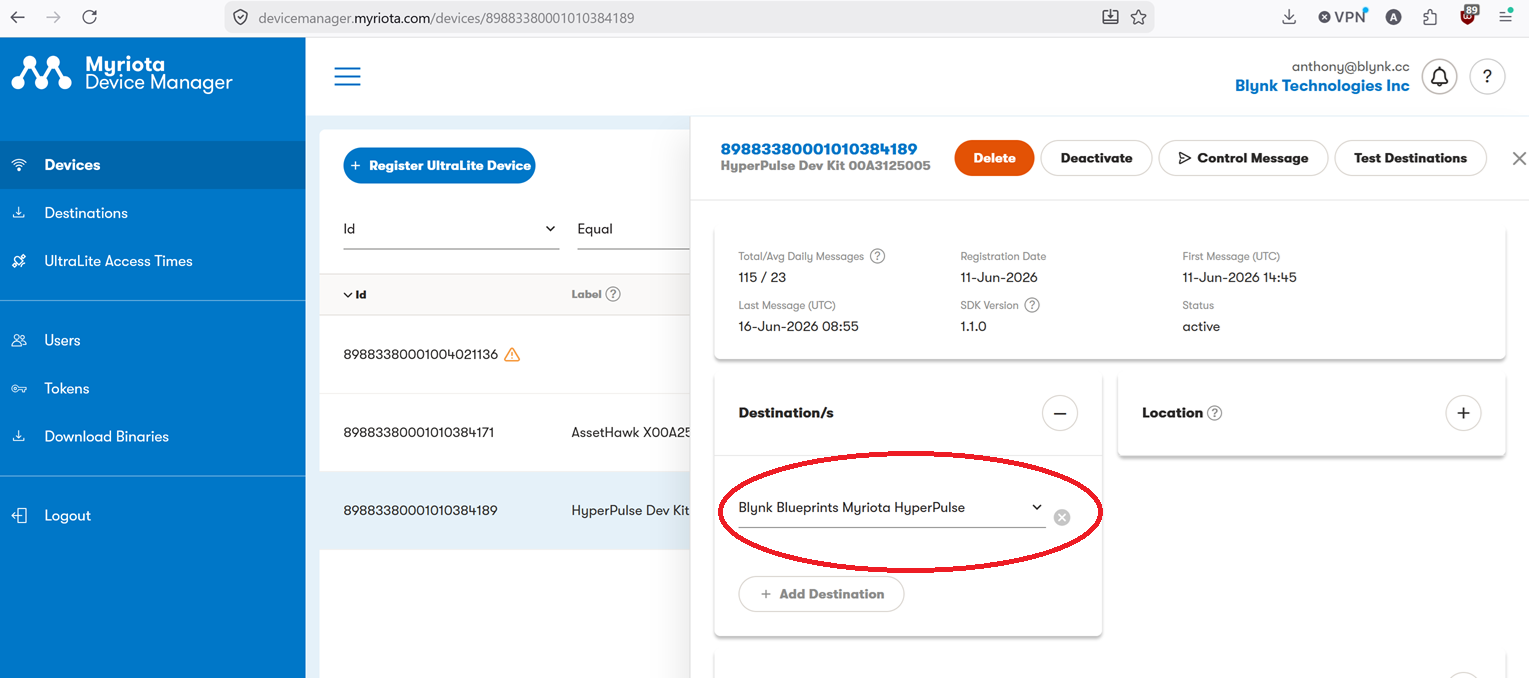
Step 5 — Add the Destination to the Device
In Myriota Device Manager, open your HyperPulse device (from Step 3). In the Desitination section click the + and add the destination created in the previous step.
Step 6 — Create a New Device in Blynk
In Blynk Console, go to Devices → Add New Device.
Select From Template and choose the HyperPulse template installed in Step 1.
Give the device a name and click Create.
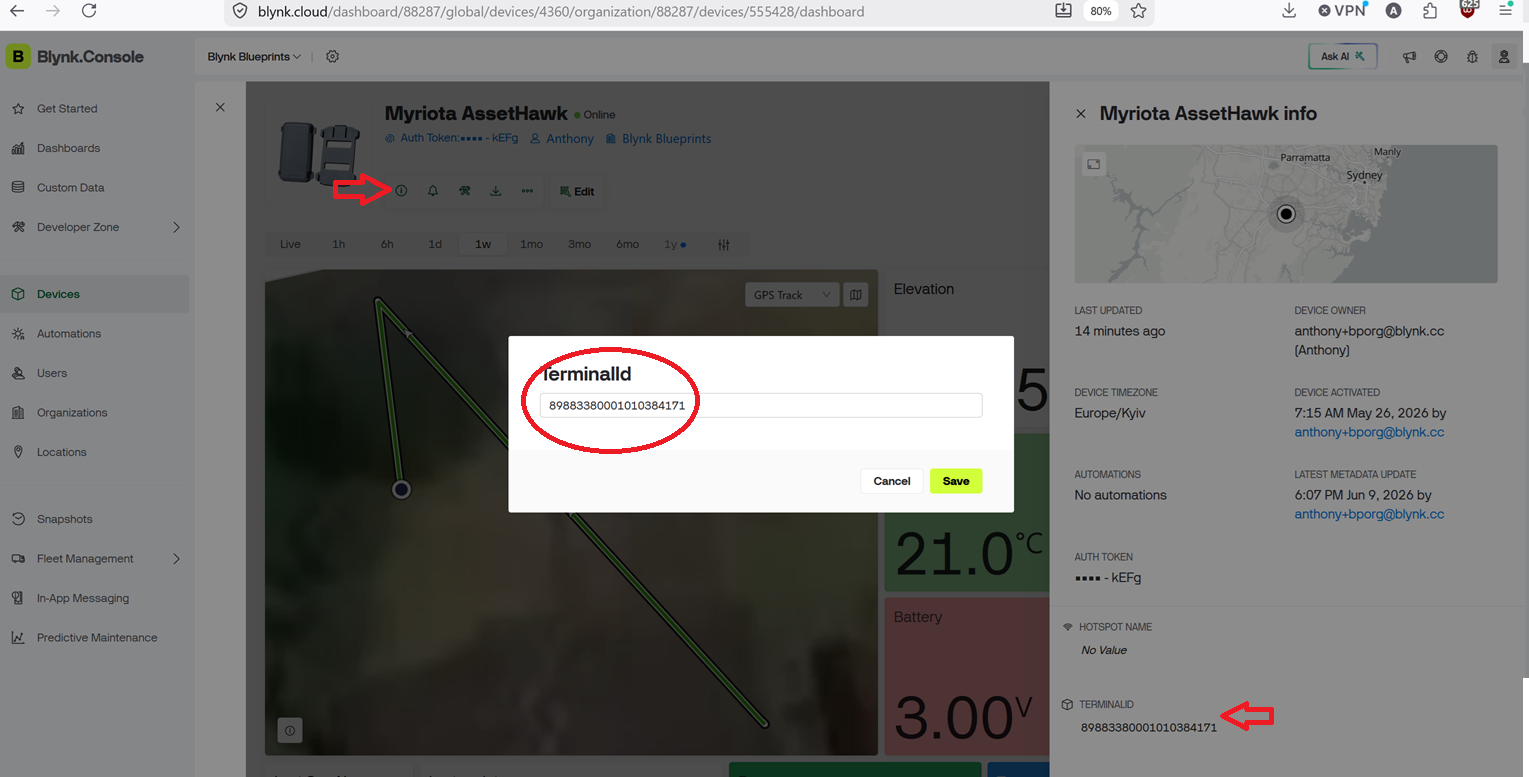
Step 7 — Set the Blynk Device TerminalId with the Myriota Device ID
The Data Converter uses the TerminalId metadata field to match incoming Myriota messages to the correct Blynk device.
In Blynk Console, open the newly created device.
Go to Device Info → Metadata.
Important: The TerminalId value must match the Myriota Device ID exactly, including letter case.
Waiting for Data
Thats it!
Your pipeline is now fully configured. On the next satellite pass, the HyperPulse will transmit a reading which will travel:
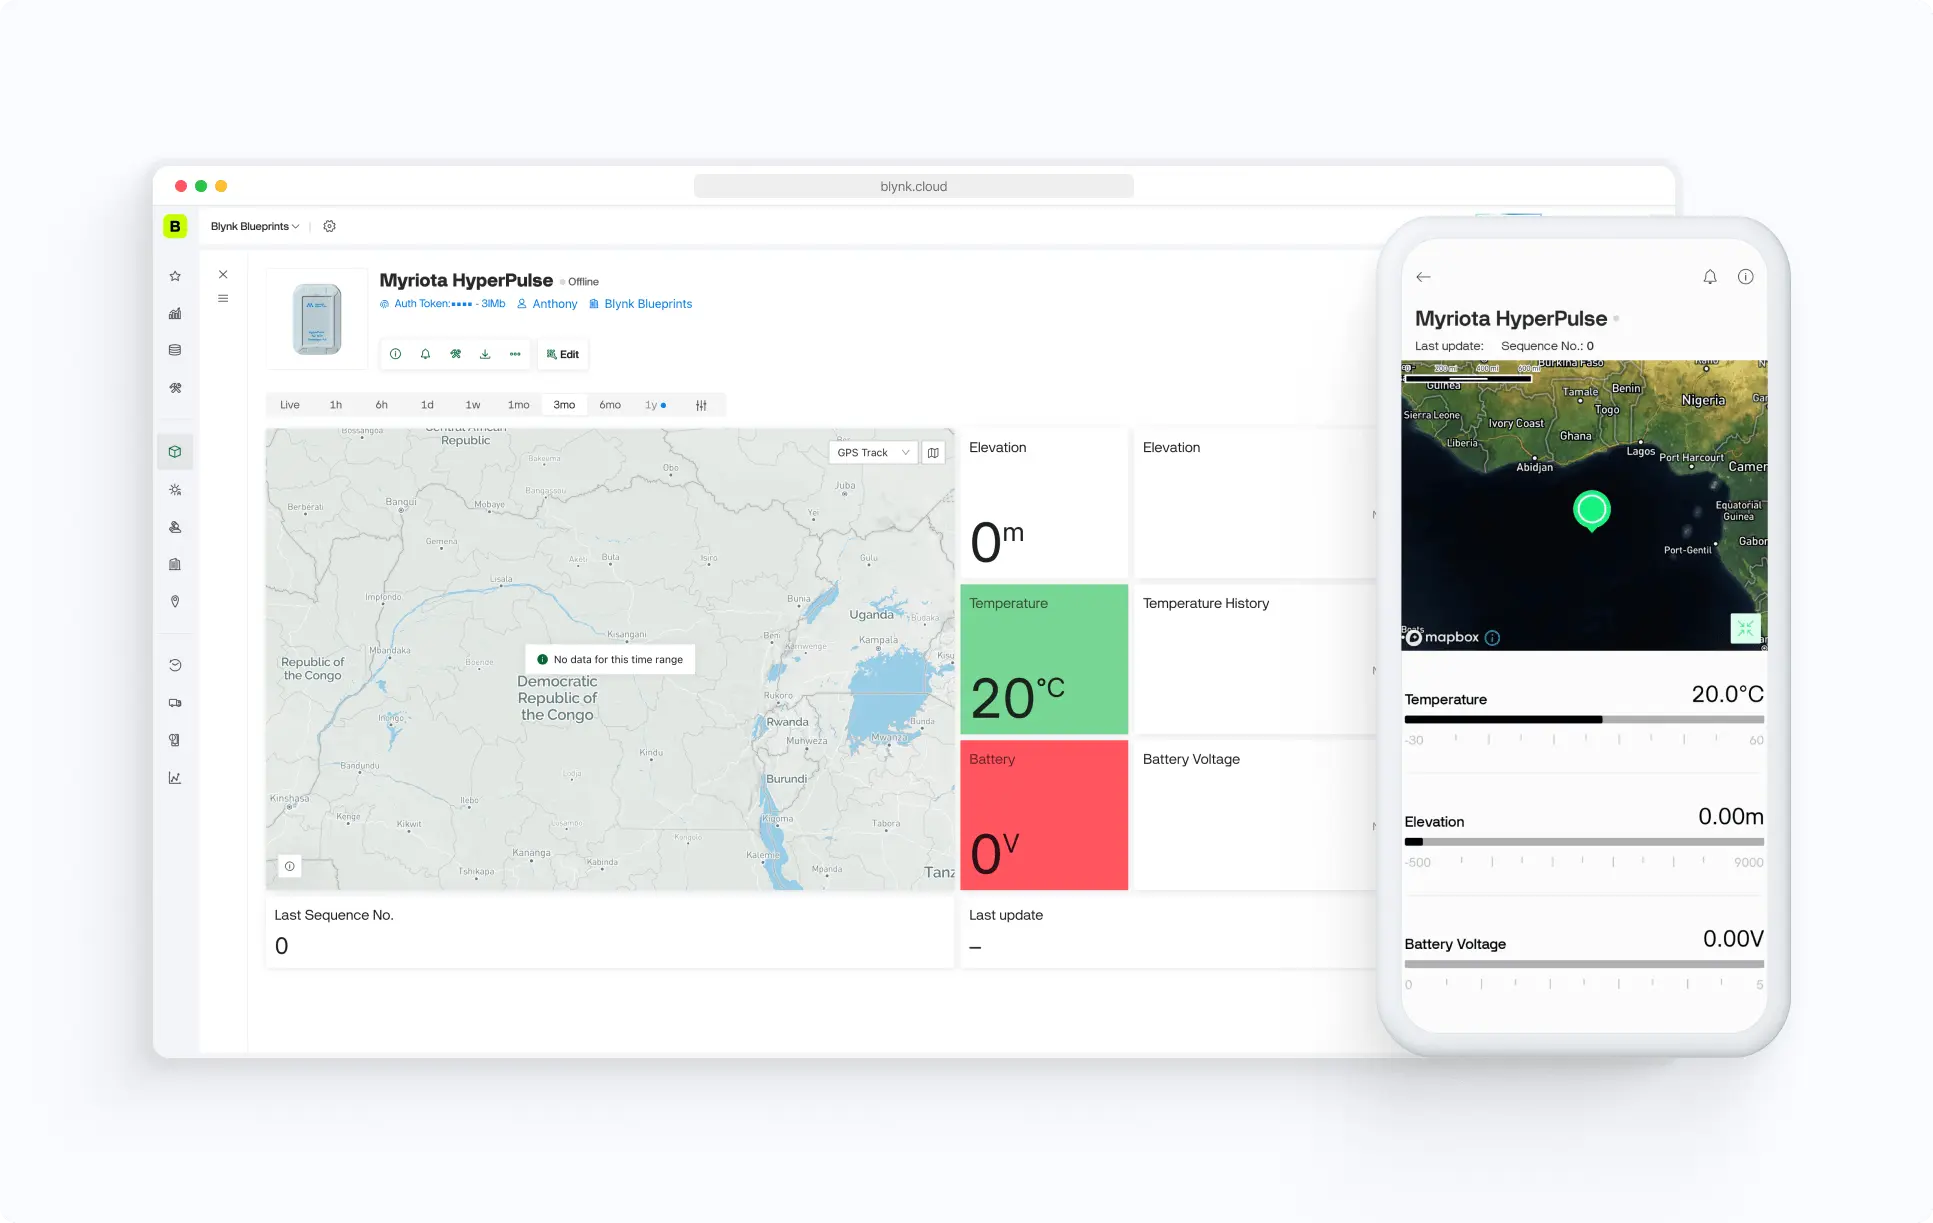
Depending on satellite coverage and the device's transmission schedule, the first reading may take minutes to a few hours to arrive. Once received, sensor values will populate your Blynk dashboard widgets and be visible in the Blynk mobile app.
You can monitor incoming messages under Devices → your device → Timeline in the Blynk Console.


.png)


