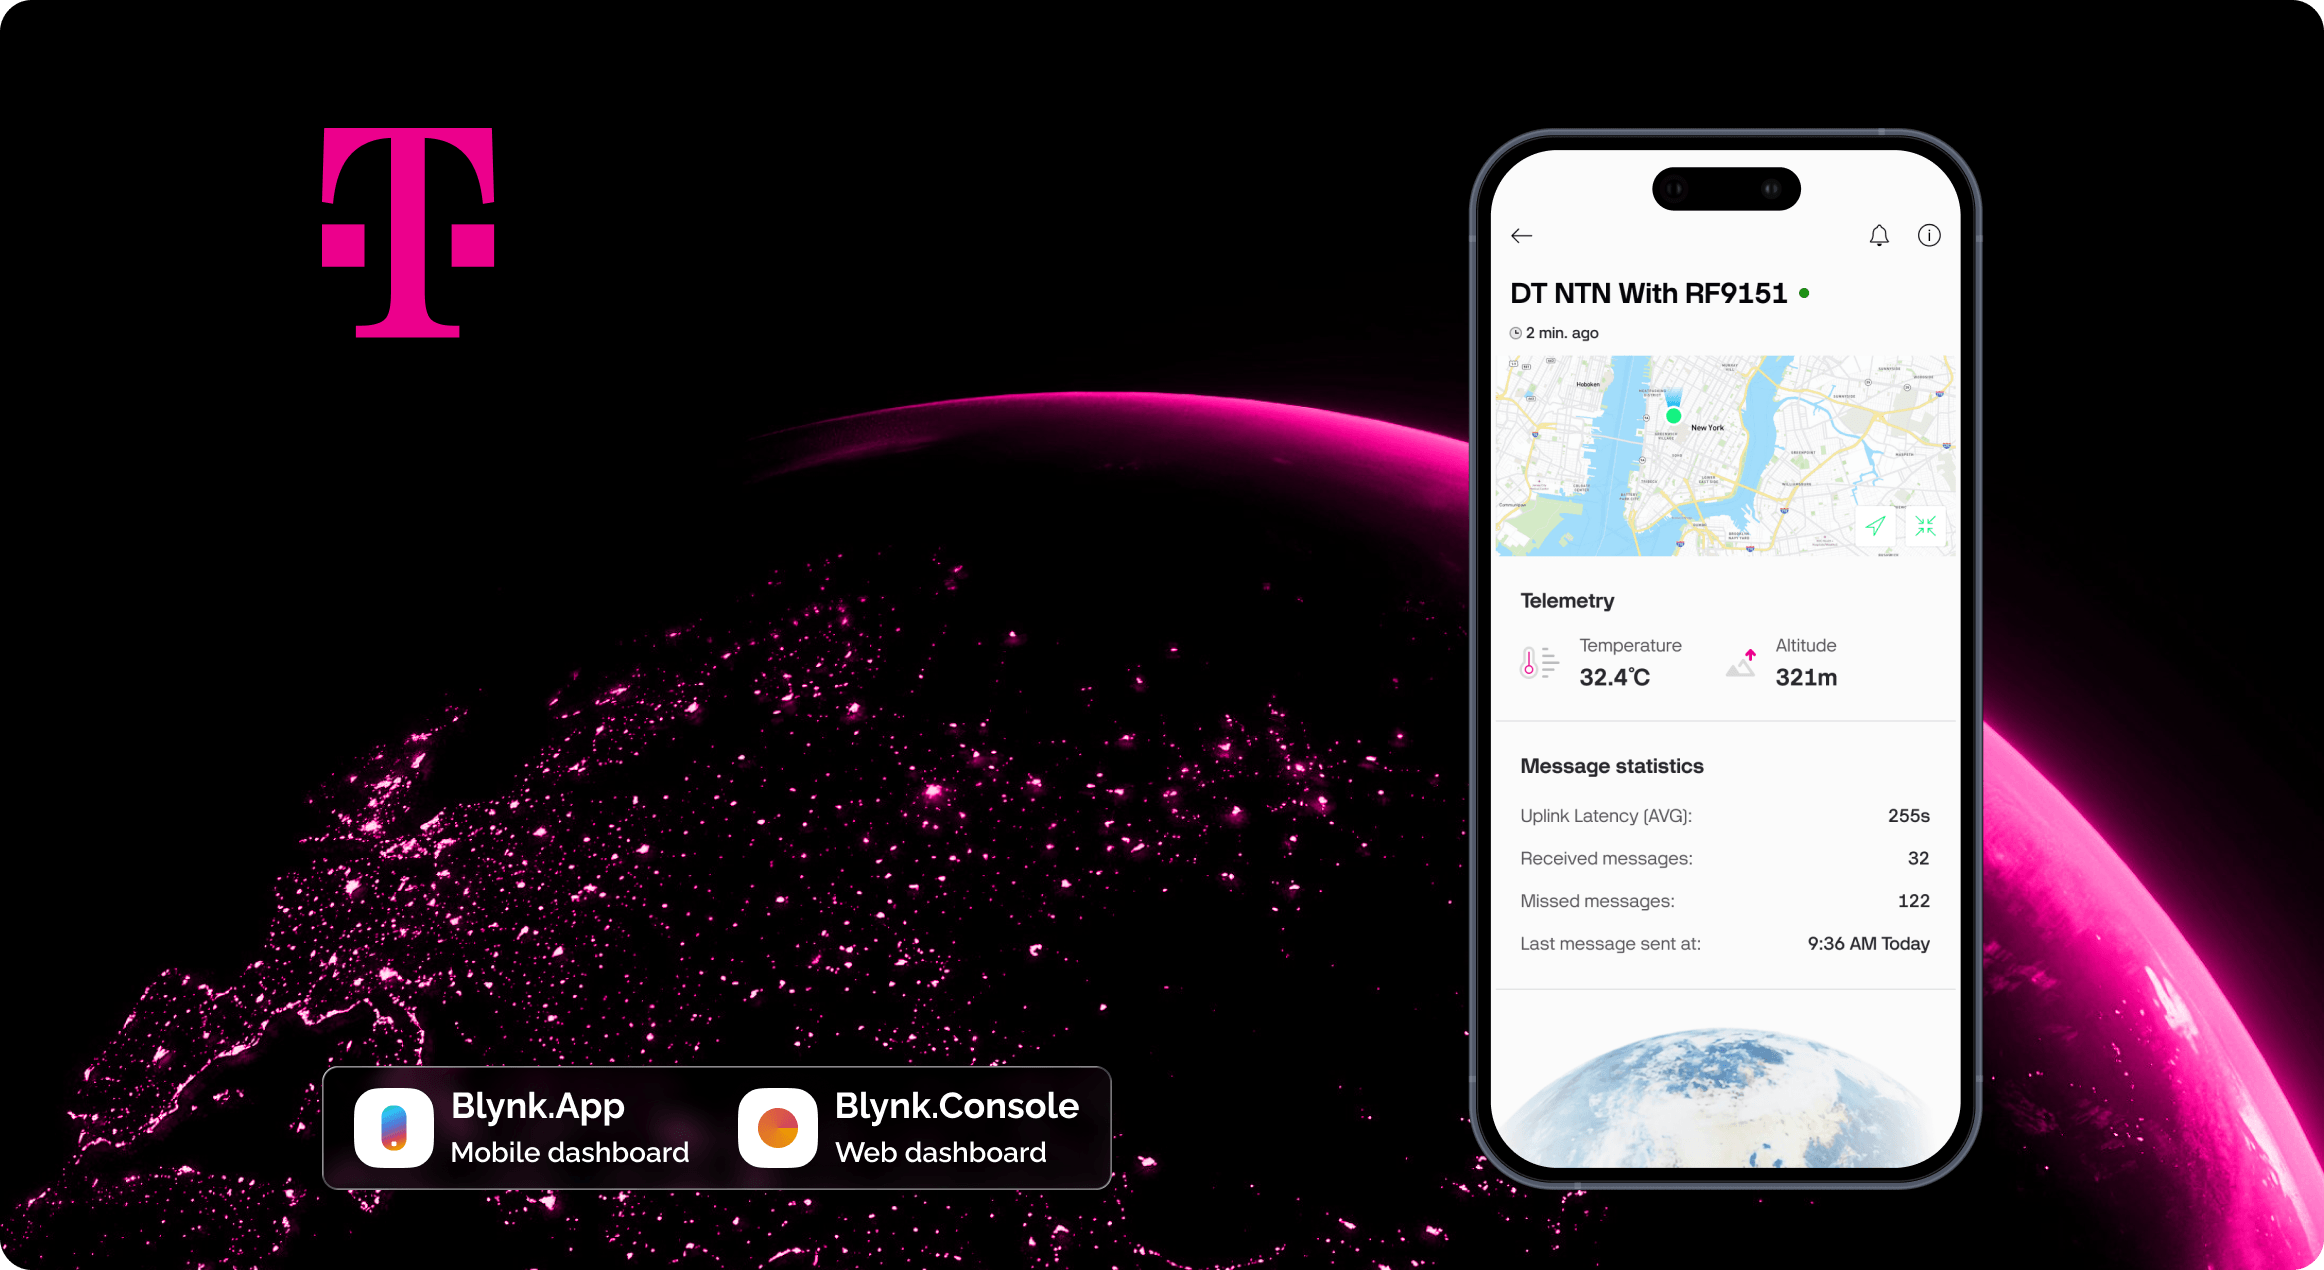
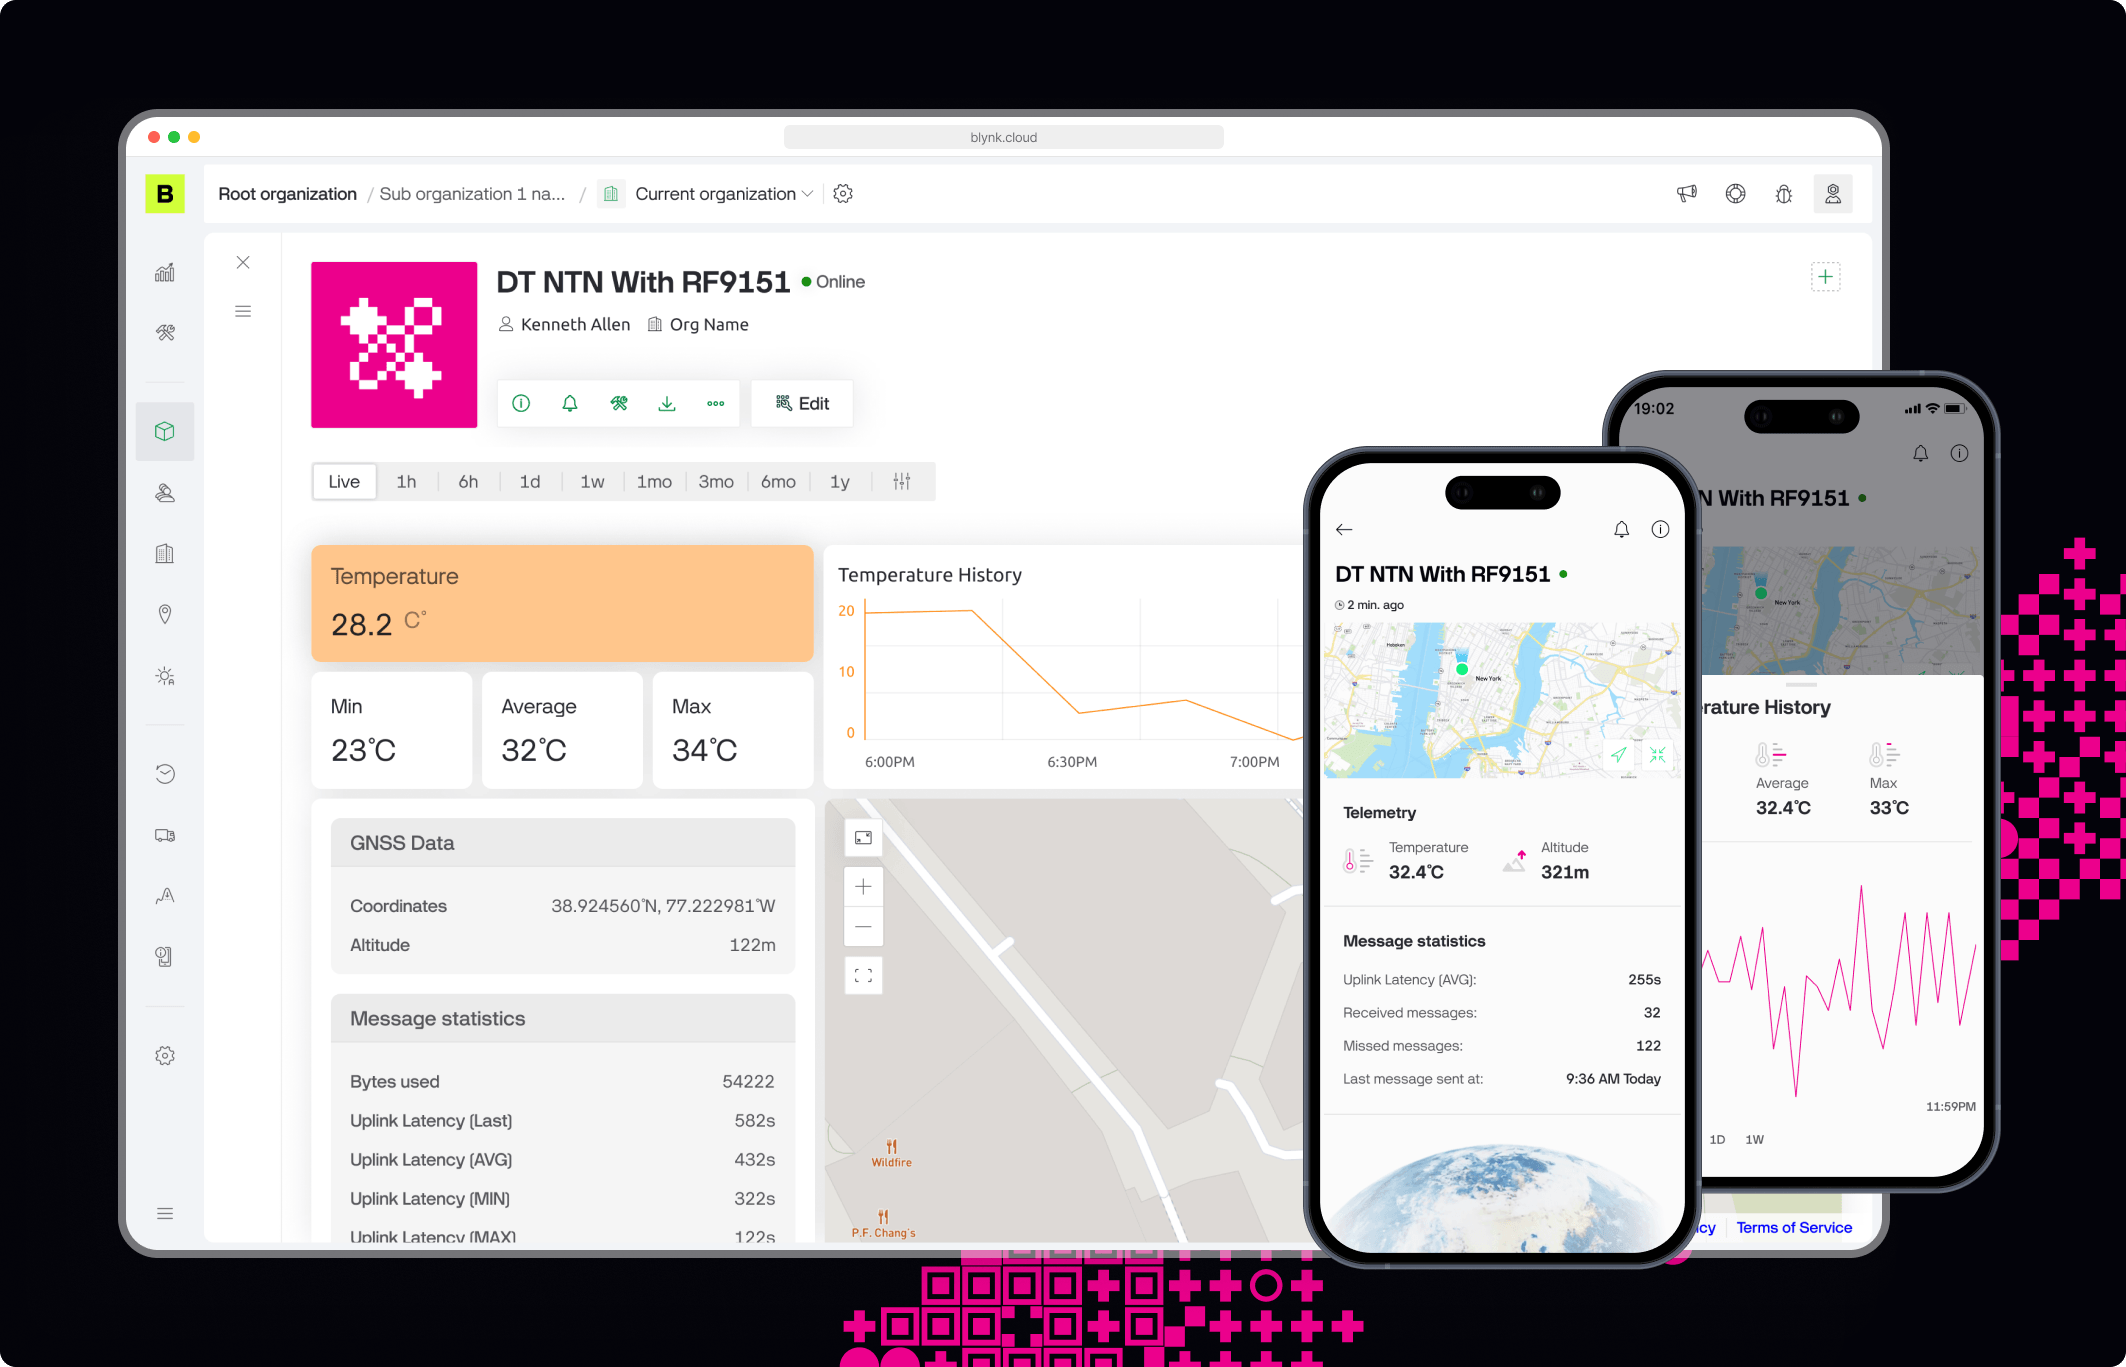
Blueprint is a pre-configured template on the Blynk IoT platform, that will help you create a fully functional project in a few minutes. It already includes mobile and web dashboard UI, working firmware, and a tutorial to help you connect your device to the Blynk IoT platform and control it from the app!
On this page you can review the blueprint to have an idea of the ready project you are going to get. Sign up for a free account on the Blynk IoT platform to try it out.
Introduction
This guide walks through connecting a Nordic nRF9151 development kit to the Blynk IoT platform using Deutsche Telekom's Non-Terrestrial Network (NTN) satellite connectivity. The nRF9151 connects via Deutsche Telekom's Device-to-Cloud (D2C) platform, which forwards telemetry to Blynk; Blynk receives and visualises that data through its Data Converter pipeline.
By the end of this guide, your device will send GPS location and sensor data from anywhere on the planet to a Blynk web dashboard and mobile app, with no cellular coverage required.
The full path the data travels:
nRF9151 → Satellite or cellular → Deutsche Telekom D2C → Blynk Data Converter → Blynk Device
Unlike a store-and-forward satellite network, this path is near-real-time: device to dashboard typically takes 8 to 20 seconds.
Prerequisites
Hardware
Nordic nRF9151 SMA DK (A1 silicon revision or newer; earlier revisions do not support NTN)
NTN-capable antenna (2 GHz S and L band). An external antenna is recommended for reliability.
GPS antenna. NTN requires a GPS fix before connecting, so the device can calculate satellite timing-advance offset.
The nRF9151 comes with two chips and therefore two different firmware packages - the cellular modem and the MCU. Depending on where you got your development board, you may or may not need to update both firmwares. It is important to verify this, as flashing the wrong firmware may erase pre-installed nuSIMs. You can verify your current firmware by using the AT command AT+CGMR.
Also, if your nRF9151 board has be pre-provisioned with a DT nuSIM then the modem firmware has already been updated. DO NOT perform Step 1a as this will erase the nuSIM.
1a. Update the modem firmware
The modem firmware that ships on the nRF9151 may not support NTN. Verify that it does, or update it before anything else.
Open nRF Connect for Desktop and install the Programmer app if you haven't already.
Connect the nRF9151 board to your computer with a USB-C data cable and power it on.
In the Programmer app, select your device from the dropdown.
Click Add file and select the downloaded ZIP.
Click Write to flash the firmware.
1b. Flash the application firmware
The application firmware is based on Nordic's Asset Tracker Template, NTN branch. Nordic's prebuilt binaries only cover the main (cellular) branch, so Blynk provides a prebuilt NTN binary.
1. In nRF Connect for Desktop, open the Serial Terminal app and connect to your device.
2. You should see log output as the firmware boots, searches for a GPS fix, and attempts NTN registration.
1d. Read the device IMEI
You will need the IMEI in Step 5. The IMEI QR code on the chip is often too small to scan, so read it over UART.
Note: The UART command interface is only active after a GPS fix. Take the device outside with a clear view of the sky, GPS antenna connected, and wait for the fix before running the command.
In the Serial Terminal, type (note the lowercase at at the start):
at AT+CGSN=1
You should see:
+CGSN: 351358810123456 OK
Write down this number — it is your device's IMEI.
Step 2 — Activate the SIM
This step is not needed if your board has nuSIM installed
The nRF9151 SMA DK ships with three SIMs. One is a Deutsche Telekom SIM pre-provisioned for NTN.
1. Find the SIM number printed on the back of the Deutsche Telekom SIM.
3. Wait for Deutsche Telekom to enable NTN on your SIM (up to 2 business days).
Data allowance: The dev-kit SIM includes 50 KB. Data is metered in 1-byte blocks regardless of payload size, so each message consumes at least one block.
Step 3 — Install the Blynk DT NTN Blueprint
Blueprints are pre-built solutions that configure your Blynk workspace with the correct datastreams, dashboard widgets, and Data Converter script for a specific device type.
3. Find and select DT NTN quickstart with nRF9151.
4. Click Use Blueprint. This copies it into your account as a new Template (under Developer Zone → Templates), pre-configured with datastreams, a dashboard, and the Data Converter.
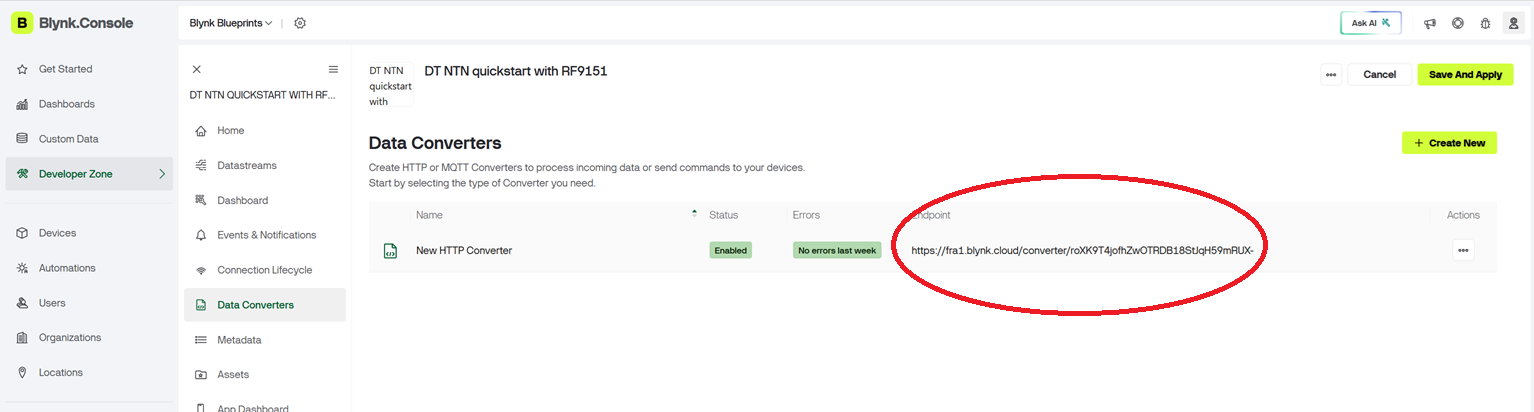
Step 4 — Find the Data Converter Endpoint URL in your Blynk Template
The Data Converter receives raw data from D2C and translates it into Blynk datastream values. The Blueprint already includes it; you just need its endpoint.
1. In Blynk Console, go to Templates and open the DT NTN template.
The region prefix (e.g. fra1) matches the Blynk cloud your account lives on.
Keep this URL to hand; you will paste it into D2C in Step 5.
How matching works (multi-device): the Data Converter routes each incoming message to the correct Blynk device by matching the SIM's ICCID against the device's ICCID metafield. The Blueprint's converter uses handler.useAuthMetaField('ICCID') so one endpoint serves all your devices.
>
Advanced — customising the decoder: the device sends raw bytes to minimise over-the-air cost. The converter parses the byte payload, extracts GPS location and device timestamp, computes in-flight duration, and writes the template datastreams. Edit the converter JavaScript to parse additional sensor fields from your firmware.
Step 5 — Configure Deutsche Telekom Device to Cloud (D2C)
Open the Deutsche Telekom websiteand sign in using your Telekom Business Account. The login credentials and account information were provided via email. Use the details from that email to complete the sign-in process.
Click on the tile “Data Provisioning” to access the Device to Cloud application.
Device to Cloud (D2C) needs three linked objects: a Device, a Device Group, and an Application that forwards data to your Blynk endpoint.
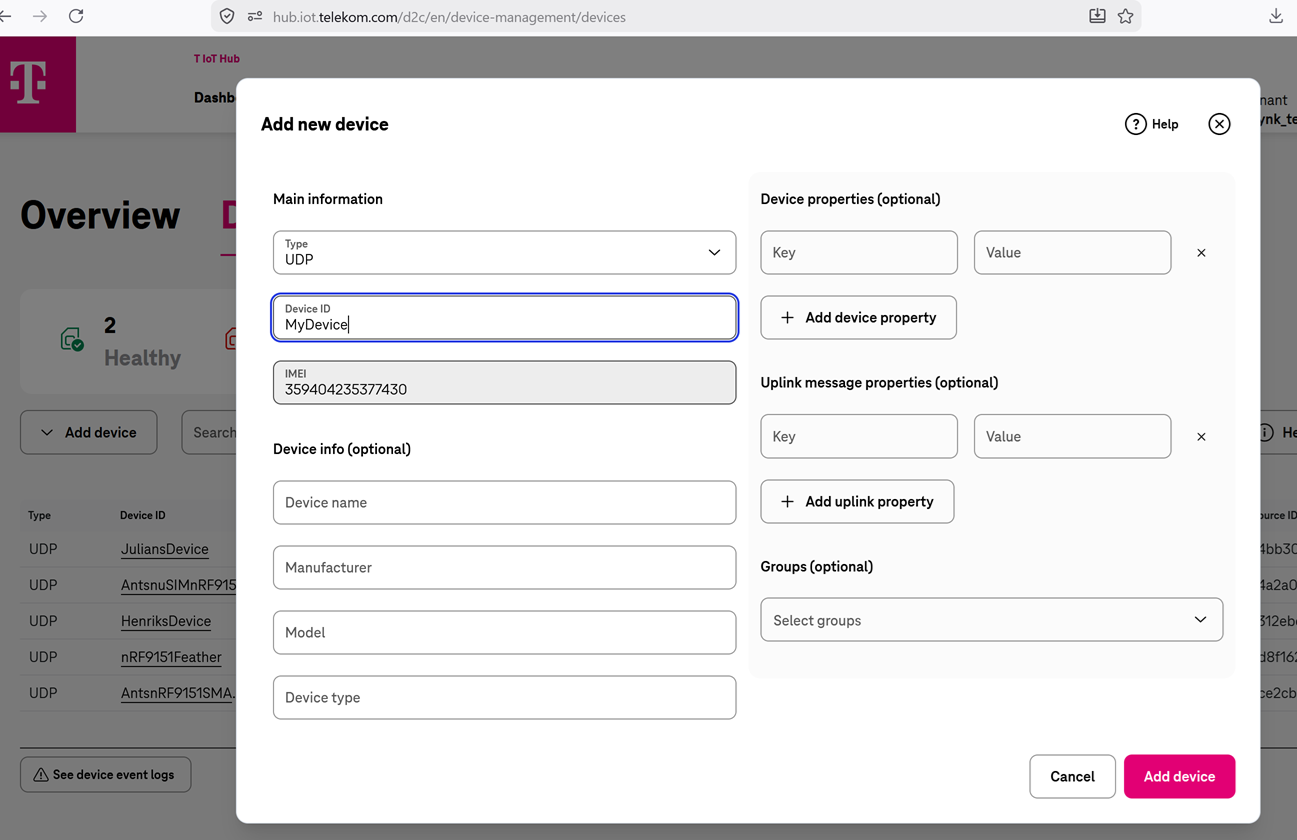
5a. Create an NTN Device
1. Log in to your D2C tenant and navigate to Devices; create a new device.
2. Set the type to UDP.
3. Enter the IMEI from Step 1d.
4. Give it a Device ID that helps identify the device (no spaces).
5. Save. The status will show "Provisioning."
5b. Integrate your Application Webhook (the forward to Blynk)
An Application tells D2C where to send your device's data — this is the equivalent of a webhook pointing at your Blynk converter.
1. Navigate to Applications and create a new application.
2. Set the type to Webhook.
3. For the Target URL, paste the Blynk Data Converter Endpoint URL from Step 4.
4. Save.
5. Select “Edit Device” via Actions in the list and assign your created device to the default Device Group which has been automatically created for the Application before
Tip: You can create multiple Applications on the same Device Group to send the same data to multiple endpoints — useful for parallel monitoring and integration testing.
Step 6 — Create a new device in Blynk
1. In Blynk Console, go to Devices → Add New Device.
2. Select From Template and choose the DT NTN template from Step 3.
3. Give the device a name and click Create.
Step 7 — Set the Blynk device ICCID to match your SIM
The Data Converter uses the ICCID metadata field to match incoming messages to the correct Blynk device.
1. Open the newly created device in Blynk Console.
2. Go to Device Info → Metadata.
3. Set the ICCID field to your SIM's ICCID.
Important: The ICCID must match exactly. A mismatch is the most common reason data does not appear.
Step 8 — Power up and verify
1. Take the device outside with a clear view of the sky. Both the GPS and NTN antennas need sky access.
2. Power the device via USB or battery.
3. In the Serial Terminal you should see: GPS fix acquired → NTN registration successful → first uplink sent.
4. In the D2C console, your device should show an incoming message.
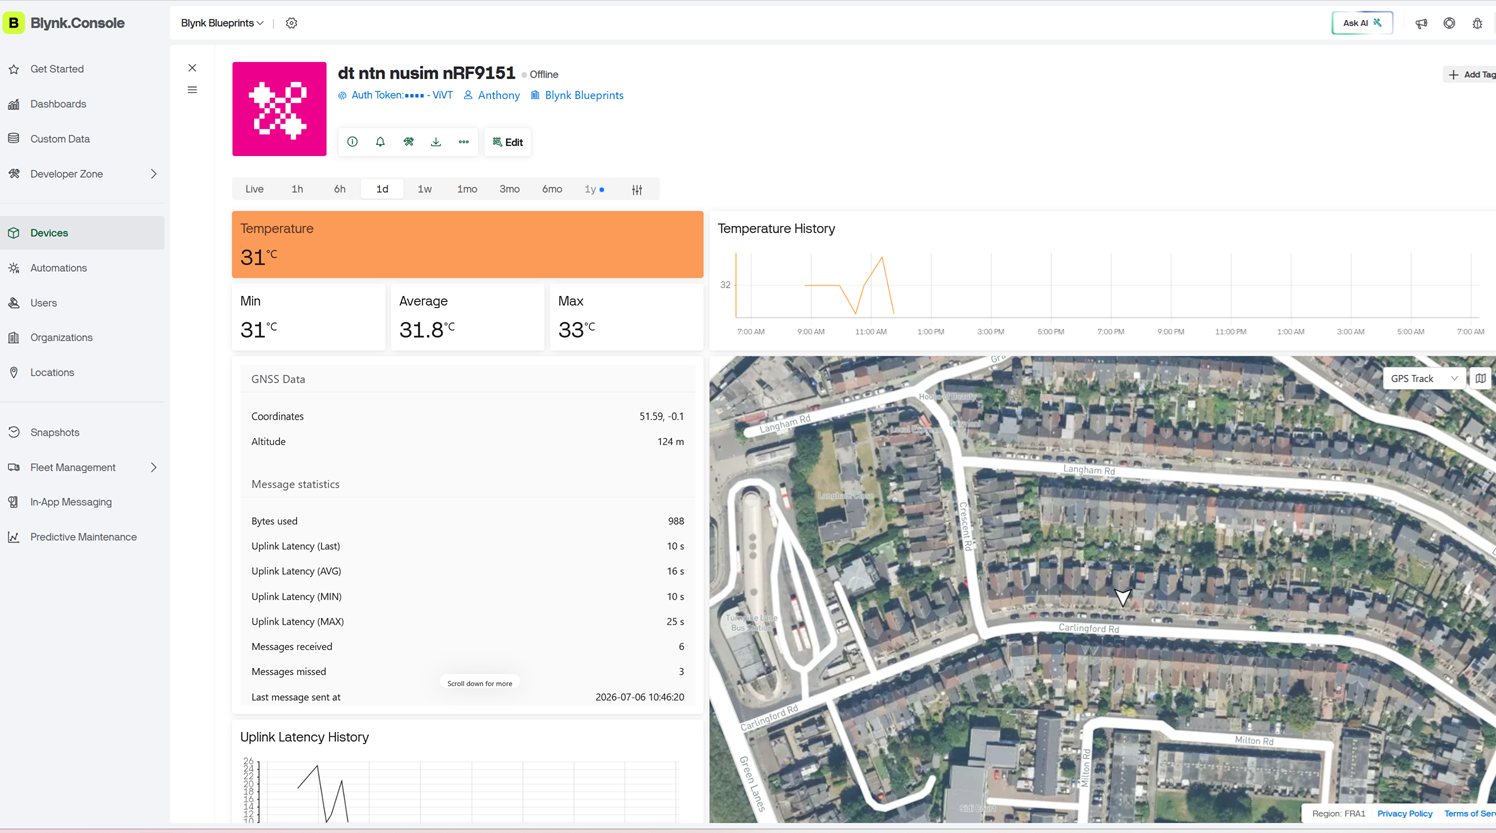
5. In your Blynk dashboard, within 8 to 20 seconds of the uplink, the datastreams should update with location and timestamp.
Expected behaviour
End-to-end latency (device to dashboard): 8 to 20 seconds over satellite.
GPS accuracy: ~200 m with basic GNSS (no assisted GPS).
The device sends periodically; the interval depends on firmware configuration.
You can also watch incoming messages under Devices → your device → Timeline in the Blynk Console.
Troubleshooting
No GPS fix
Confirm the GPS antenna is connected and the device is outside with a clear view of the sky, and aimed towards the equator.
A cold fix can take several minutes on first boot. Be patient.
Device not connecting to NTN
Confirm A1 silicon or newer (earlier revisions do not support NTN).
Confirm the modem firmware was updated (Step 1a).
Confirm the SIM is activated and NTN-enabled by Deutsche Telekom (Step 2).
Data not appearing in Blynk
Check the D2C console to confirm the uplink arrived.
Confirm the D2C Application Target URL matches your Blynk Data Converter Endpoint exactly (Step 4 / 5c).
Confirm the device's ICCID metafield matches the SIM exactly (Step 7).
Check the Data Converter logs in the template for decoder errors.
IMEI command not responding
The UART command interface is only active after a GPS fix. Get a fix outside first.
Next steps
Add more devices: repeat the device + ICCID steps. One Data Converter endpoint serves all of them.
Customise the Data Converter JavaScript to parse additional sensor data from your firmware.





.png)